
How to Do Gradient PCR: Find the Best Annealing Temperature
One run, eight temperatures, one clear answer. Here's the beginner-friendly way to stop guessing your annealing temperature.
Quick answer
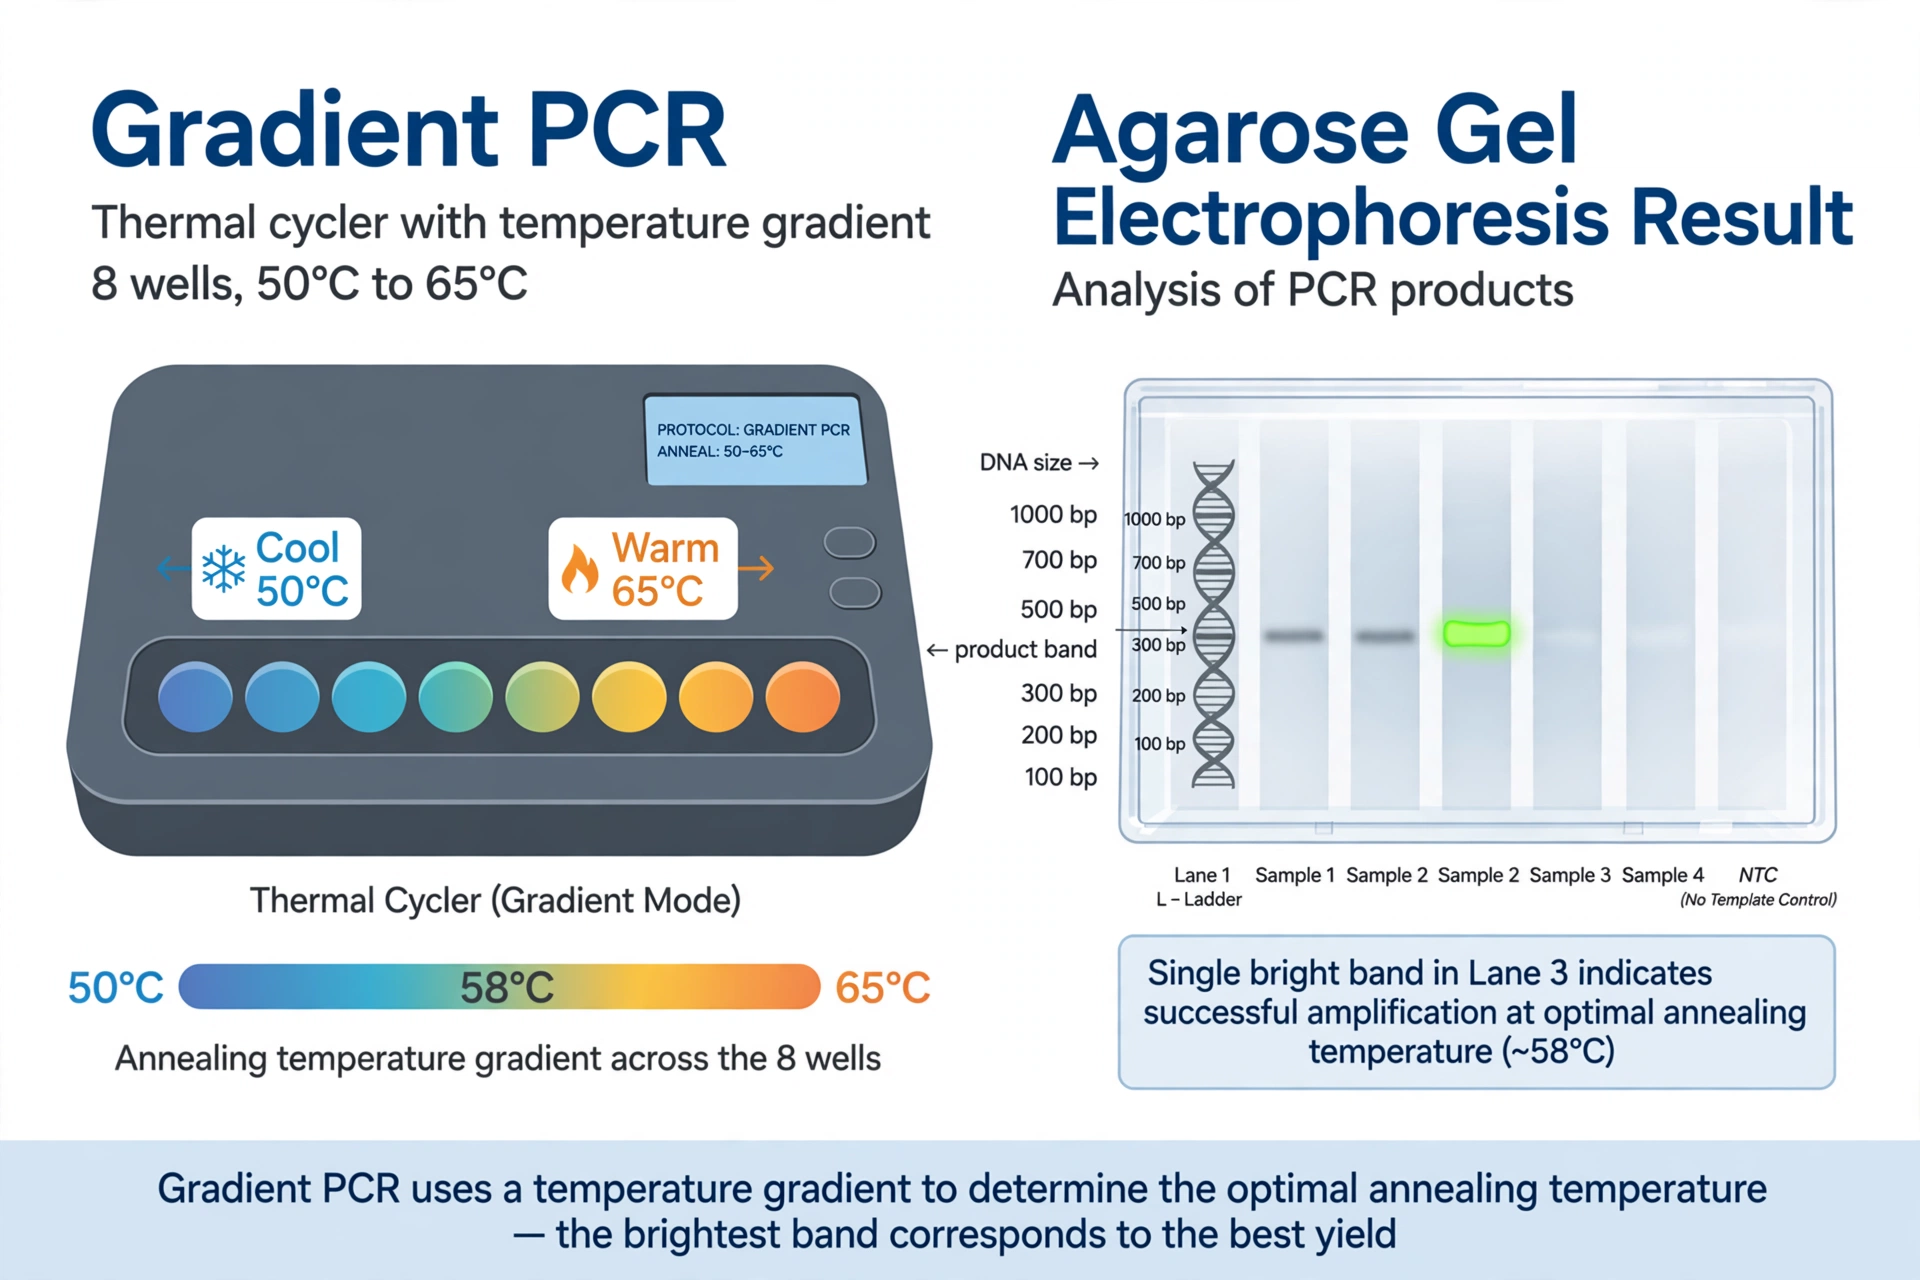
Gradient PCR tests several annealing temperatures in a single run, so you can find the best one without running PCR eight separate times. Centre the gradient on your calculated annealing temperature, span about 10 °C, and pick the temperature that gives one strong, clean band with no extra bands.
What Is Gradient PCR?
Gradient PCR is a normal PCR run where each column of the thermal cycler block sits at a slightly different annealing temperature. The annealing temperature is the step where primers — short, single-stranded DNA pieces that mark where copying should start — bind to the template DNA. Everything else stays identical, so any difference on the gel is down to temperature alone.
Here's the thing: a calculated annealing temperature is only a starting guess. We see this in lab forums every week — someone runs one temperature, gets a smear, and assumes the primers are bad. Half the time the primers are fine; they were just run at the wrong temperature. A gradient answers that in one afternoon.
How Do I Choose the Gradient Range?
Start from your primers' calculated annealing temperature, then test about 5 °C below it and 5 °C above it, for a total span of roughly 10 °C. If your calculated value is 58 °C, run 53–63 °C. Bio-Rad's PCR assay design guide gives the same rule: test above and below the calculated Tm, then choose the temperature with the highest yield and no nonspecific amplification. JoVE's published gradient protocol uses a 55–65 °C range as its worked example. Check both primer Tm values first with our Tm calculator and the annealing temperature guide, and centre the gradient on the lower one.
How to Do Gradient PCR, Step by Step
Make one master mix for all the gradient lanes, split it into eight tubes or wells, and let the cycler vary only the annealing step. Keep template amount, primer concentration, and cycle number exactly the same across every lane.
- Calculate. Take a starting annealing temperature about 3–5 °C below the lower primer Tm.
- Make one master mix for eight reactions plus a little extra, plus one no-template control (NTC) — everything except template DNA.
- Note the layout. Write down which temperature each well gets before you start.
- Program the gradient with the low and high ends; keep denaturation, extension, and cycle number as in your normal protocol.
- Load the gel in order, lowest to highest temperature, with a DNA ladder at one end and the NTC beside the samples.
How Do I Read the Gradient Gel?
Look for the lane with one strong band at exactly the expected size and nothing else — no smear, no extra bands, no faint band below 100 bp. That lane's temperature is your winner, and in our experience it is often 1–3 °C higher than the temperature people were guessing before.
| What you see | What it means | What to do |
|---|---|---|
| One clean band, strong | That temperature is right | Use it for all future runs |
| Band plus extra bands or smear | Temperature too low | Move to a hotter lane |
| Faint band or nothing | Temperature too high | Move to a cooler lane |
| Small band under 100 bp in the NTC | Primer dimers | Redesign primers or lower concentration |
Pick the clean lane over the brightest messy one — extra bands mean off-target copying that carries into every downstream step. If two neighbouring lanes both look clean, I would take the hotter one for a little more specificity headroom.
What If No Lane Gives a Clean Band?
If every lane is messy, faint, or empty, temperature is probably not your main problem, and a wider gradient will just waste another afternoon. A gradient can only optimise primers that are basically sound; it cannot rescue a badly designed pair. Check primer design for 3′ complementarity with our primer design guide, drop the primer concentration to 0.2–0.3 µM, and check the template quality. If you get no bands at all, that guide walks through template and cycling faults in order.
Can I Do This Without a Gradient Cycler?
Yes — you just trade one run for several, and the gel reading stays exactly the same. QIAGEN's FAQ on optimal annealing temperature describes this fallback plainly: set up the same reaction in duplicate at different annealing temperatures, either in different machines or back to back in one machine. So what actually works? Pick three temperatures — your calculated value, 3 °C below it, and 3 °C above it — keep everything else identical, keep the NTC in every run, and load all three products side by side on one gel.
Key takeaways
- Gradient PCR tests a range of annealing temperatures in one run; only the annealing step varies.
- Centre the gradient on your calculated annealing temperature and span about 10 °C (±5 °C).
- Pick the hottest lane that still gives one strong, clean band at the right size.
- If no lane is clean, fix primer design or concentration first.
Frequently Asked Questions
What temperature range should I use for gradient PCR?
Centre the gradient on your primers' calculated annealing temperature and span about 10 degrees — roughly 5 degrees below and 5 degrees above it. For primers with a calculated annealing temperature of 58 °C, run 53–63 °C.
Can I do gradient PCR without a gradient thermal cycler?
Yes. Run the same reaction in separate tubes at different annealing temperatures, either in different machines or back to back in one machine. It takes longer, but the gel reading is exactly the same.
What if no lane in my gradient PCR gives a clean band?
Then temperature is probably not the main problem. Check primer design for 3′ complementarity, lower the primer concentration to 0.2–0.3 µM, and consider redesigning the primers before running another gradient.
Sources: Bio-Rad's PCR assay design and optimization guide and QIAGEN's FAQ on determining the optimal annealing temperature. Once you've picked your temperature, run the primers through our free Tm calculator to record the final conditions with the pair.